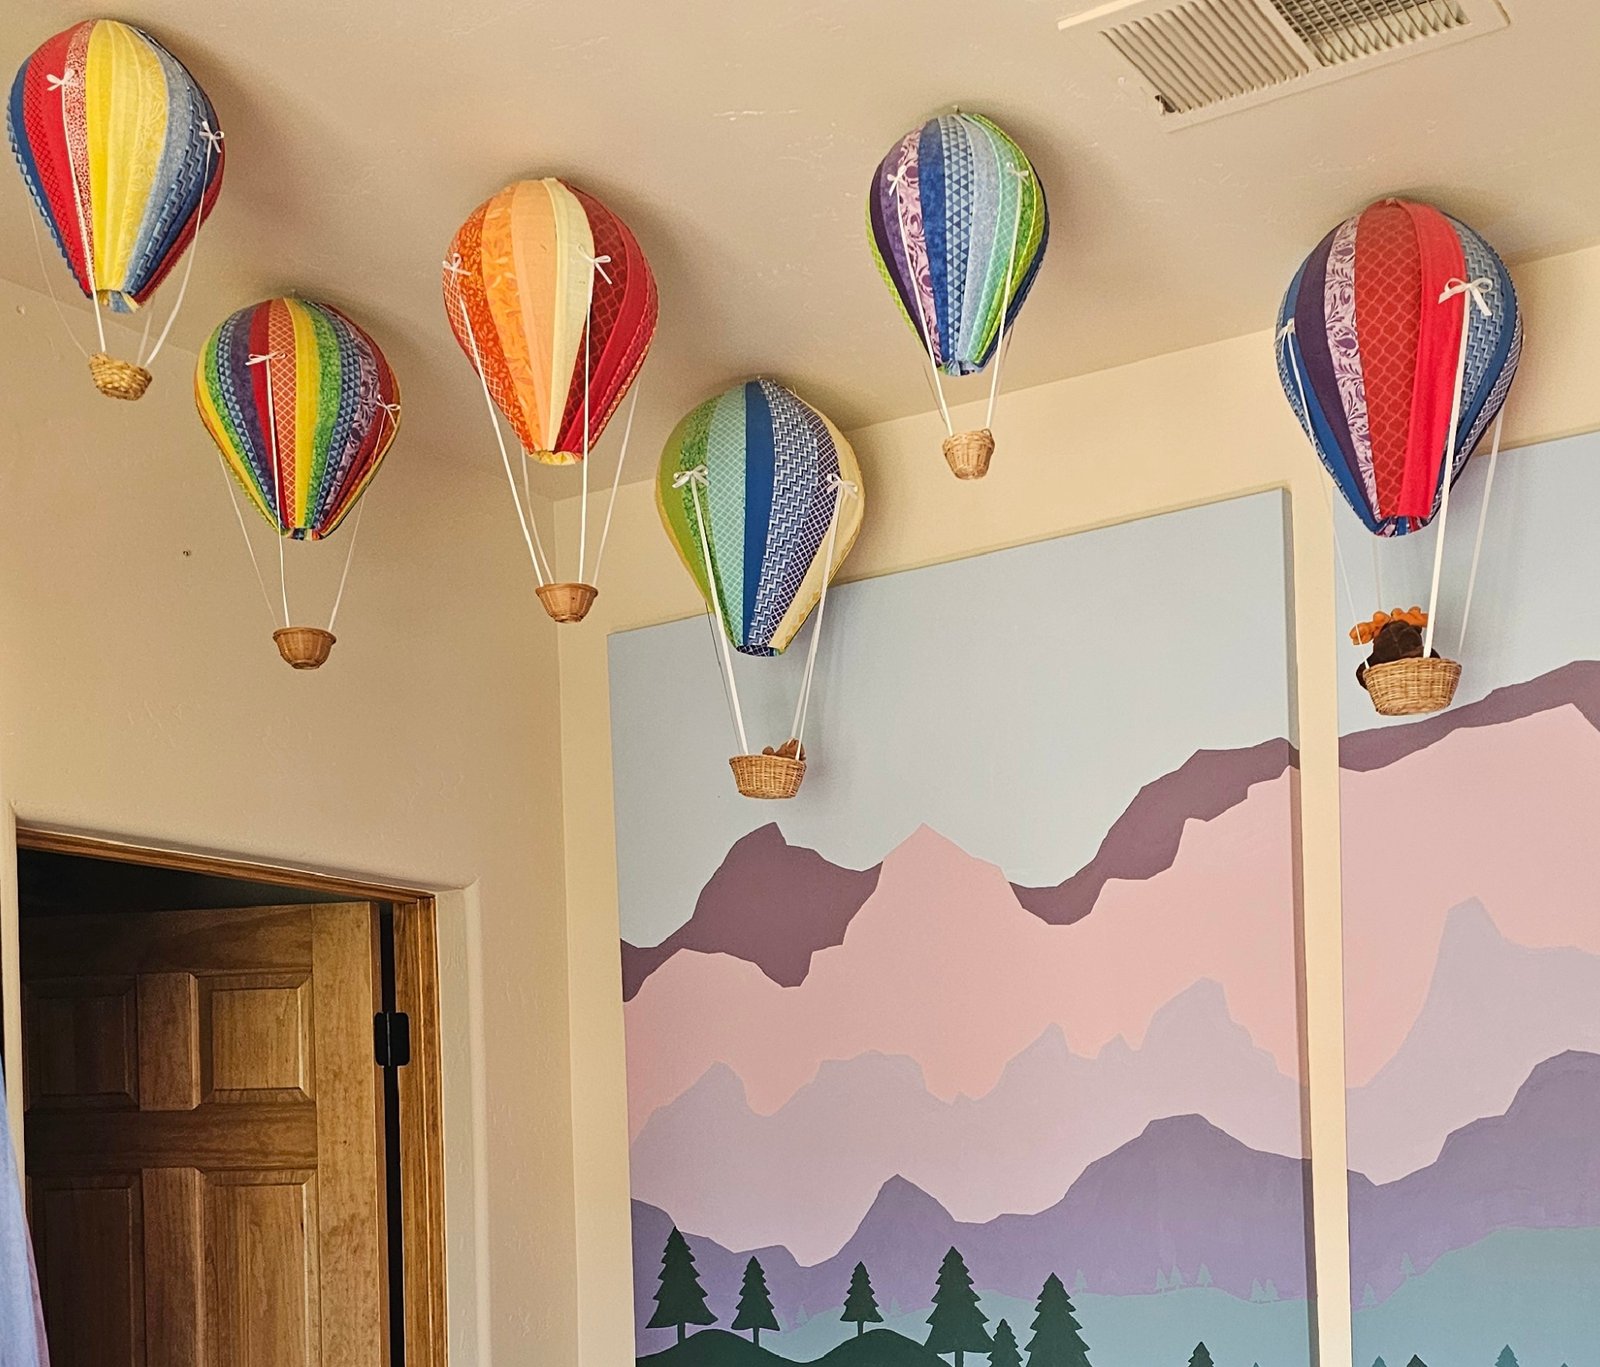
When I started decorating our nursery, I knew I wanted to include hot air balloons. They fit the magical feeling I was hoping to create, connected to our home in New Mexico, and provided a colorful contrast to the more muted mountain mural we painted on the walls.
I wasn’t happy with the options I found online, and many of the DIY tutorials looked much more time-consuming than I wanted to tackle.
This project ended up being surprisingly approachable, and it’s still one of my favorite nursery projects.
Project Snapshot
Time: About one afternoon
Difficulty: Beginner
Cost: Approximately $75
Best for: Nurseries, playrooms, kids’ bedrooms
Skills you’ll use: Measuring, cutting fabric, ironing, hot gluing
What I Used
- Chinese paper lanterns (I used 6″, 8″, and 10″)
- Plastic cups (I used both a small and a larger size)
- Cotton quilting fabric (I bought a couple of packs of fat quarters)
- Hot glue gun and glue sticks
- Narrow ribbon
- Small unfinished wood baskets
- Small chain and hooks for hanging
- Fabric scissors
- Iron and ironing board
Before You Start
- Decide how many balloons you’d like and what sizes work best for your space.
- Choose your fabrics before you begin. Laying everything out together makes it much easier to create a balanced color palette.
- Assemble the Chinese lanterns before starting.
The Design Decisions
Before starting, I spent more time thinking about the overall look than the construction itself.
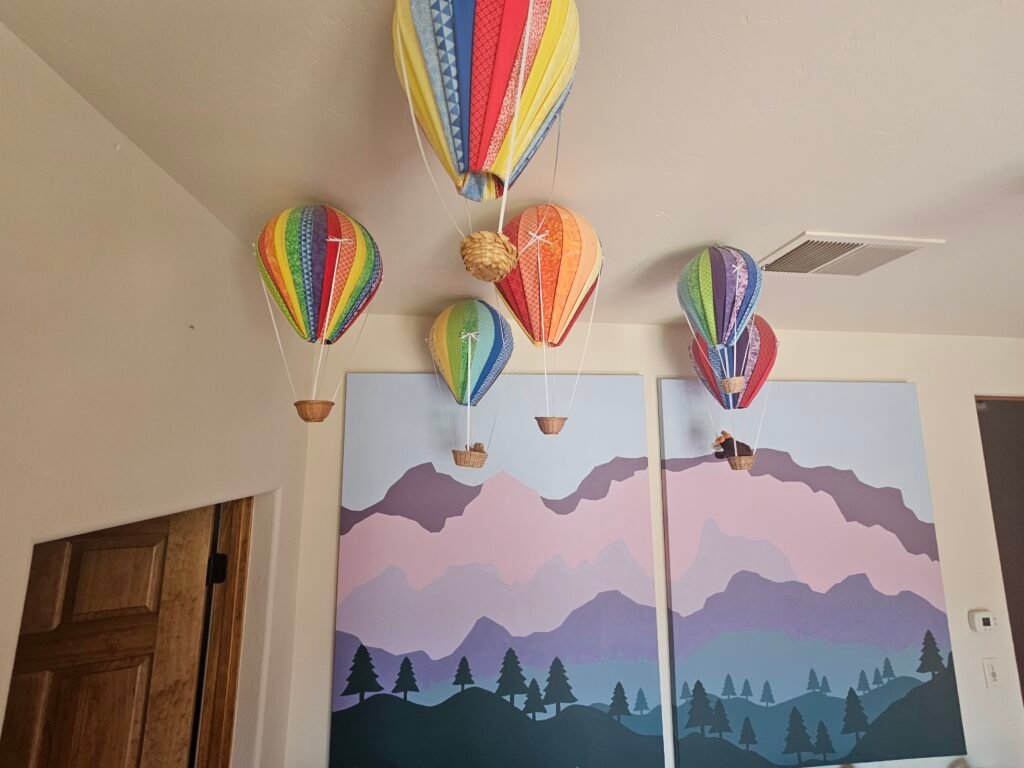
I decided to use several different balloon sizes because I wanted them to look like a collection rather than a matched set. The variation makes the finished display feel much more natural, almost as if some balloons are farther away on the horizon than others.
The trickiest part was deciding not only which fabrics to use, but how to combine them. I made a few balloons using the full rainbow spectrum and others using just a portion of the rainbow. That kept the balloons from looking identical while still distributing the colors evenly throughout the room.
For the baskets, I kept things simple by attaching narrow ribbons from the balloon to small unfinished wood baskets. They added just enough detail without making the decorations feel heavy or overly complicated. I was able to find a multipack of baskets in different shapes and sizes, although unfortunately I don’t think it’s available anymore.
The final touch was adding a few stuffed animals to a couple of the baskets.
The Process
I started by cutting out the bottoms of the plastic cups (this gives you access to an interior edge to glue the fabric to) and hot gluing the mouth of each plastic cup to the bottom of a Chinese lantern. The cups create the tapered bottom of the balloon and provide an easy place to attach the basket.
Next, I laid out the fabrics to decide which combinations I wanted to use. Once I was happy with the overall color distribution, I measured the distance from the top of each lantern to the bottom of the plastic cup and cut the fabric slightly longer to leave enough material for gluing at both ends.
For the width of each strip, I mostly eyeballed it. Since I knew I wanted each strip to overlap the previous one, I had quite a bit of flexibility to adjust the spacing as I worked my way around the lantern. The last strip overlaps both the previous strip and the first strip, hiding the seam and creating a finished look. As I was repeating a series of colors for each balloon, I also made sure to end on the final color in the series.
Finally, I hot glued each strip of fabric to the top of the lantern and the bottom of the cup, overlapping each strip slightly with the previous one. The very last strip of fabric will overlap the previous strip and also the very first strip. [image]
One thing I learned the hard way was that the cut edges of the fabric tended to fray and looked a little ragged. After finishing the first balloon, I started folding over the cut edge of each strip and pressing it with an iron before attaching it. That created a much cleaner edge, added a little weight to the fabric, and helped it stay in place better.
After covering each lantern, I attached ribbon from the widest part of the balloon to the wood basket using hot glue. Getting all of the ribbons attached evenly so the basket would hang straight took a little measuring and a little eyeballing, but it came together surprisingly well.
To finish the balloons, I made small bows from the same ribbon and glued them over each attachment point. They hid the hot glue and gave the finished balloons a more polished look.
Once all of the balloons were assembled, I arranged them together before hanging anything permanently. Seeing them as a group made it much easier to adjust the spacing, heights, and color distribution until everything felt balanced.
I hung the balloons by attaching the metal frame of each Chinese lantern to a short length of decorative chain, then securing the chain to small ceiling hooks. They were even strong enough to hold the weight of both mini and full-sized Beanie Babies, which helped tie the balloons into the woodland animal theme of the nursery.
We intentionally hung most of the balloons outside the perimeter of the crib because I was worried one might eventually fall in. It’s been several years now, though, and it turns out that particular worry—like many we have as parents—was unnecessary.
What Surprised Me
- Using different lantern sizes and hanging them at different heights made the arrangement feel much more natural, almost like a real group of hot air balloons drifting at different distances.
- Using coordinated fabrics looked much better than making every balloon completely different. The balloons felt like they belonged together without looking identical.
- Hot glue held everything securely while keeping the project simple.
If I Did It Again
Overall, I wouldn’t change much about the finished balloons.
If I were making another set, I’d start by folding over the cut edge of every strip of fabric and pressing it with an iron before attaching it. It created a much cleaner finish, reduced fraying, and helped the fabric lay more smoothly against the lanterns.
The Finished Space
The hot air balloons added exactly the touch I was hoping for. They brought color and movement to the nursery without overwhelming the room and fit naturally with the rest of the décor.
What I didn’t expect is how long we’d continue enjoying them. My kids are now 6 and 8, and the balloons are still hanging in their room. They’re also the thing that gets the most comments whenever friends come over.
For me, that’s the best measure of a successful DIY project.