Designing a DIY Rainbow Wall Mural for Our Playroom
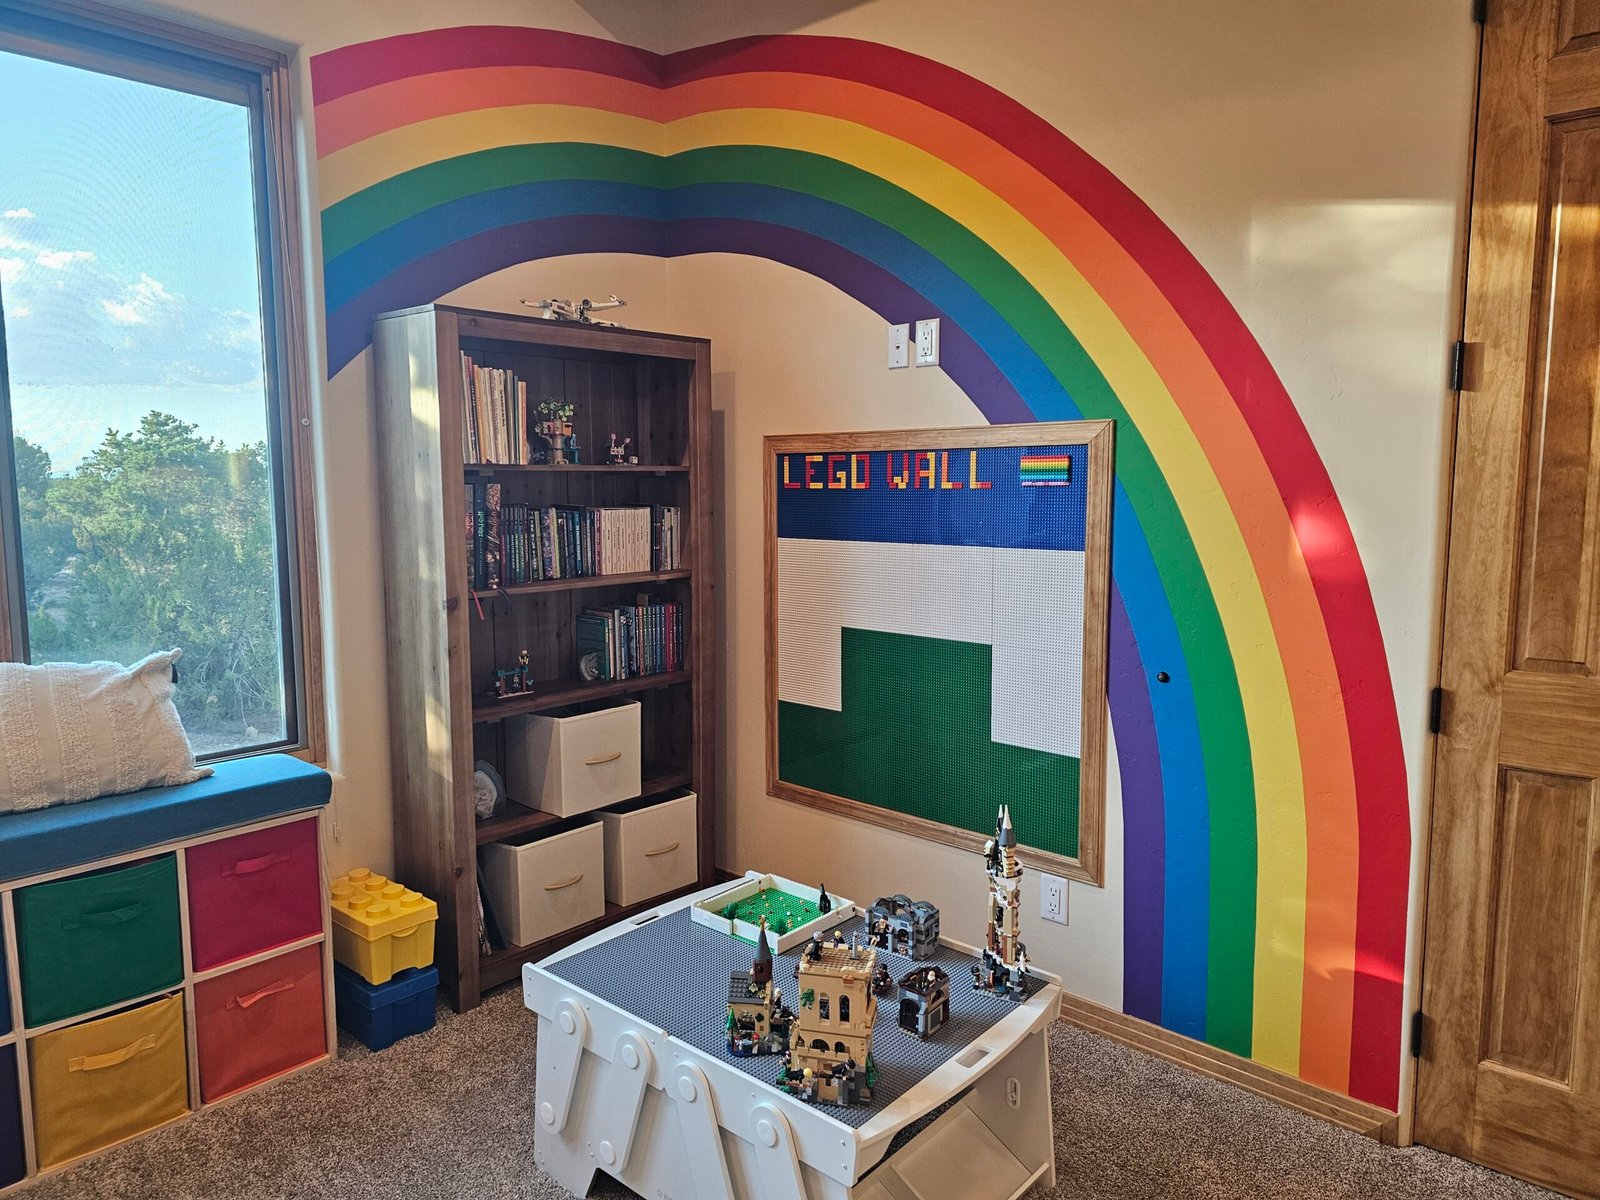
One of the first things I knew I wanted in our playroom was a rainbow mural. I wanted one feature that would immediately catch your eye when you walked into the room.
The corner next to the reading nook felt like the natural place for that feature. I wanted something colorful and cheerful that coordinated with the rest of the room rather than competing with it.
Although the painting itself was fairly straightforward, I found that the small design decisions—where to place the rainbow, how wide to make each stripe, and how to choose the colors—had the biggest impact on the finished result.
If you’re thinking about painting a mural like this yourself, I’ll walk through exactly how I planned it, painted it, and what I learned along the way.
Project Snapshot
Time: About 3 days (mostly because of drying time)
Difficulty: Intermediate
Cost: Approximately $50–60
Best for: Playrooms, kids’ bedrooms, reading nooks
Skills you’ll use: Measuring, taping, painting
Why a rainbow?
I wanted the playroom to feel colorful and inviting, but I also wanted the design to have some structure. A rainbow felt like a natural fit because it brought color into the room without feeling random.
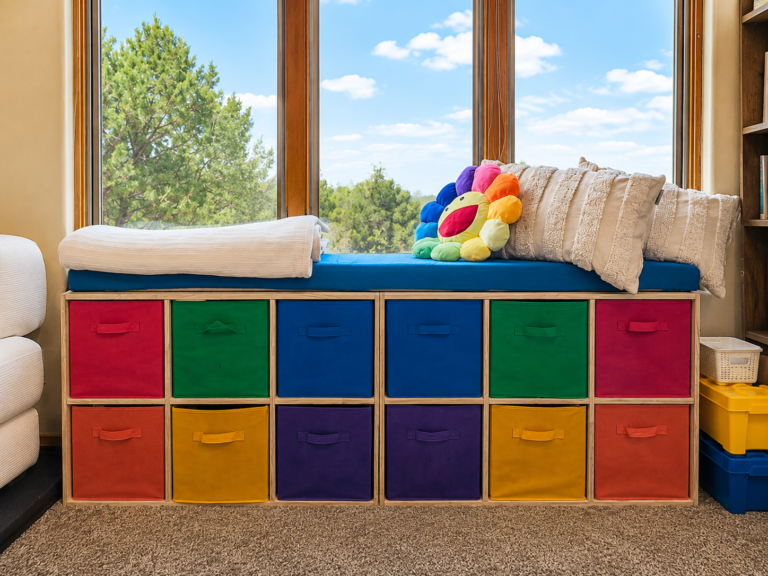
I already had rainbow storage bins in the reading nook, so using those as my starting point helped tie the room together. Rather than choosing new colors from scratch, I decided to coordinate the mural with the bins so the different parts of the room would feel intentional.
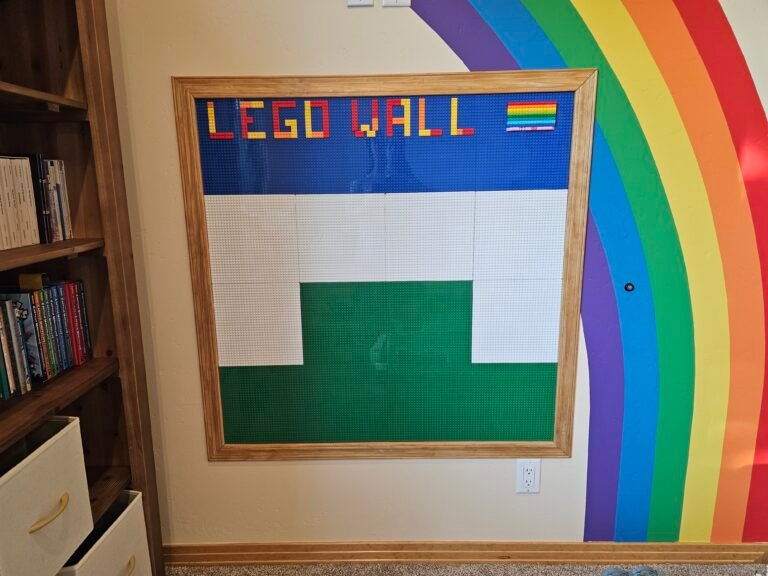
The location was an easy decision. When you enter the playroom, your eye naturally goes toward the corner next to the reading nook, making it the perfect place for a feature wall. The rainbow also helped visually connect the reading nook with the future LEGO wall on the adjacent wall, making those spaces feel like part of one larger design.
What I Used
- Six paint sample pots (paint colors listed below)
- FrogTape Delicate Surface Painter’s Tape (yellow) (needed 2 rolls)
- 4″ foam rollers
- Paint tray
- Small artist’s paintbrush
- Pencil
- String
- Small nail or push pin
- Measuring tape
- Step stool
- Drop cloth
Before You Start
- Decide where any future furniture or built-ins will go before laying out the mural.
- Tape over trim and remove outlet covers; attach drop cloth
The Decisions That Made the Biggest Difference
Before I picked up a paintbrush, there were several design decisions to make.
Looking back, these decisions had a much bigger impact on the finished mural than the painting itself.
Here’s what I considered before getting started:
- Placement. Where should the rainbow sit in relation to the corner so it felt balanced from every angle of the room?
- Shape. Should it be a traditional rainbow, or should it extend horizontally from the top of the window before curving downward?
- Symmetry. Would a perfectly symmetrical rainbow look best, or would an asymmetrical design fit the room better?
- Color palette. Which colors would coordinate with the rainbow storage bins while still feeling cohesive throughout the room?
- Scale. How wide should each stripe be so the rainbow fit comfortably between the future LEGO wall and the closet door?
Some of those decisions answered others.
For example, I knew I wanted a full-spectrum rainbow with six colors to match the six colors of the storage bins. Once I settled on that, the available wall space naturally led me to six four-inch stripes. That gave the rainbow enough presence to become a focal point while still fitting comfortably between the LEGO wall and the closet door.
I also found it incredibly helpful to create a few digital mockups before painting. I used ChatGPT to experiment with different placements and proportions, which made it much easier to visualize the finished mural before committing to the wall.
The Painting Process
Although this project took three days from start to finish, none of the individual steps were particularly difficult. Most of the time was spent choosing paint colors, waiting for paint to dry, and double-checking that I liked the placement before moving on.
Day 1: Choosing the Colors
This part actually took two trips to Home Depot.
On the first trip, I brought the rainbow storage bin inserts with me so I could match the colors as closely as possible. Rather than choosing the first color that looked right, I pulled several adjacent paint cards for each stripe so I could compare them at home.
One thing I noticed was that the colors looked best when they all had a similar level of saturation. The exception was yellow. Because yellow becomes much more intense once it’s covering a large section of wall, I intentionally chose a slightly softer shade.
Red surprised me as well. My first choice looked a little too pink on the wall, so I shifted toward a warmer, more orange-toned red.
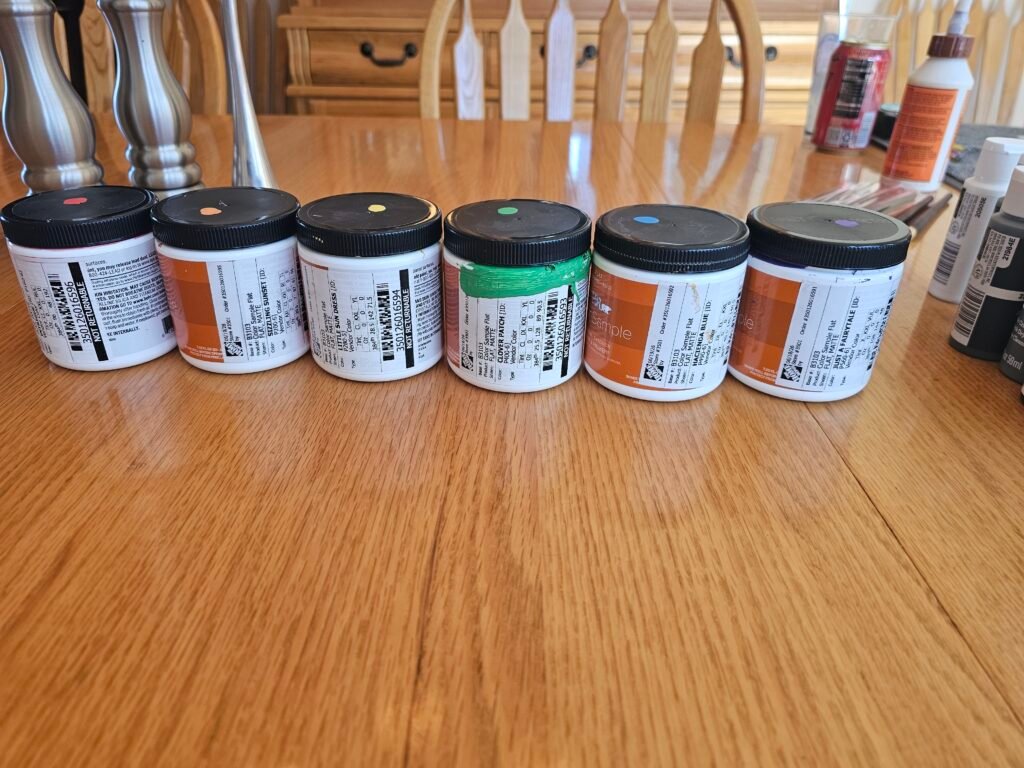
After looking at the paint cards at different times of day, I went back to Home Depot and bought sample pots of each color using Behr brand. At about $7 each, the samples were more than enough paint for the entire mural.
Red: Intrigue
Orange: Sizzling Sunset
Yellow: Little Sun Dress
Green: Clover Patch
Blue: Hacienda Blue
Purple: Just a FairyTale
Day 2: Laying Out the Rainbow
This was the most important part of the project.
Painting the stripes was fairly straightforward. Taking the time to get the layout right made a much bigger difference in the final result.
Choosing the placement
Before drawing anything, I decided where I wanted the outside edge of the rainbow to end near the closet door.
I started by centering the rainbow on the corner because it made laying out the arcs much simpler. Before committing to the design, I stepped back and looked at it from several different places in the room to make sure the proportions felt right from different perspectives.
I also measured the bookshelf I planned to add later to make sure the rainbow would still look balanced once the room was finished.
Drawing the arcs
To draw the rainbow, I used a simple pencil-and-string method.
I placed a small nail in the corner, tied a string to it, and attached a pencil to the other end. Keeping the string under constant tension created a large compass that made it easy to draw smooth, consistent arcs.
Once I was happy with the outside edge of the rainbow, I measured 24 inches inward to draw the inside edge.
Because I had already decided on six colors, that left six four-inch stripes—wide enough to stand out, but narrow enough to fit comfortably between the future LEGO wall and the closet door.
Taping the stripes
After confirming the layout, I outlined the outside edges of the rainbow with FrogTape Delicate Surface painter’s tape.
I tore the tape into pieces about 3-4 inches long, which made it surprisingly easy to follow the curve while still creating a smooth-looking arc.
One lesson I learned: make sure the pieces slightly overlap or meet cleanly. Even tiny gaps can allow paint to seep through.
Before moving on, I stood back one more time to make sure I was happy with the overall shape. The tape made it much easier to visualize the finished mural than pencil lines alone.
Sealing the edges
Because my walls have a light texture, I painted over the outer edges of the tape using the original wall color before applying any rainbow colors.
This fills the tiny gaps created by the wall texture, so when you paint the mural colors, the edges stay much cleaner and crisper.
It only takes a few extra minutes and is well worth the effort.
Day 3: Painting the Rainbow
With all of the planning finished, the painting itself was the easiest part of the project.
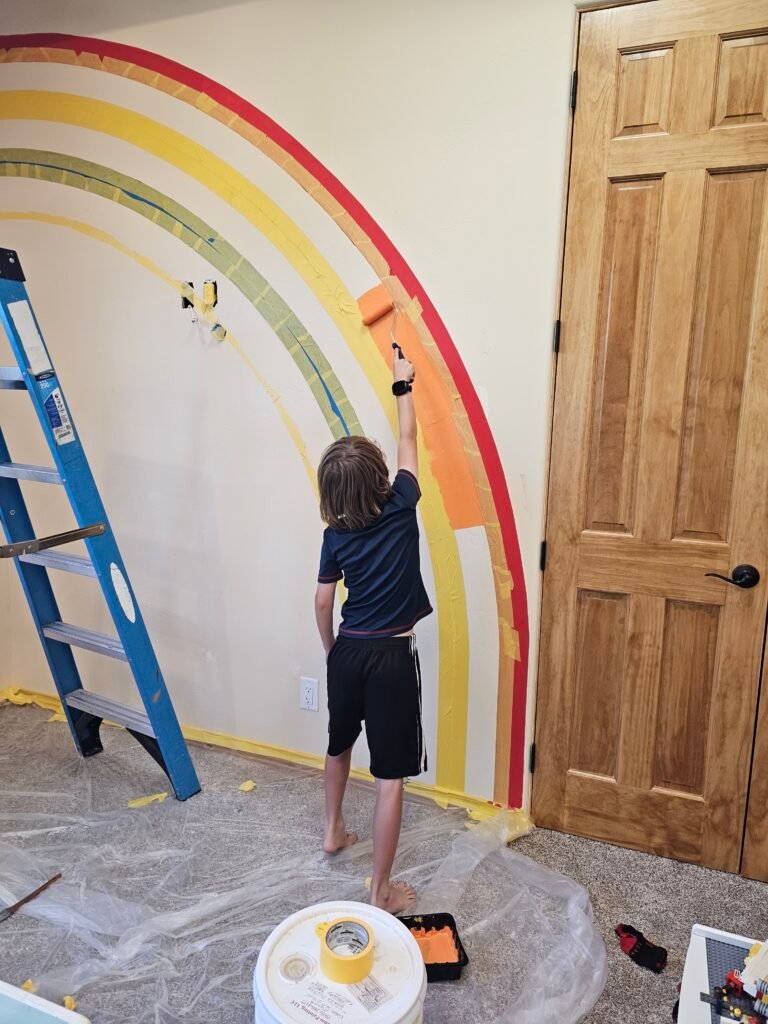
I started by painting the red, yellow, and blue stripes, using painter’s tape to outline both sides of each stripe and a 4-inch foam roller to apply the paint.
Looking back, I wish I had applied a second coat before removing the tape. I ended up touching up a few lighter areas later with a brush, which probably took longer than simply applying a second coat from the start.
Once the paint was mostly dry but still slightly tacky, I carefully removed the tape. Waiting until the paint was completely dry can sometimes cause the edges to chip, so removing it a little earlier gave me cleaner lines.
After the first three colors had dried completely, I taped and painted the orange, green, and purple stripes using the same process. This time I left a very narrow strip of the previous color visible under the edge of the tape so there wouldn’t be tiny gaps of wall color between the stripes.
The final step was touch-up. Using a small artist’s brush, I cleaned up any areas where paint had seeped under the tape or coverage wasn’t quite even. I intentionally saved the wall color for last so I wouldn’t have to repaint it if I accidentally dripped one of the rainbow colors.
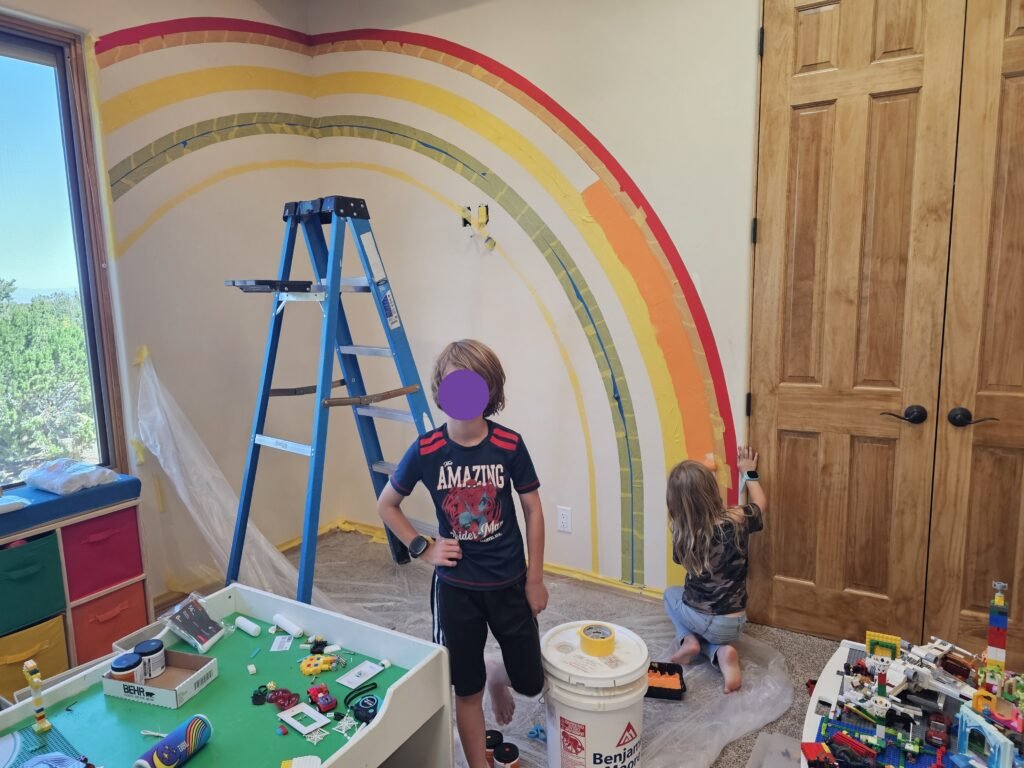
One of my favorite parts of the project came during the painting itself. The kids helped paint the sections they could comfortably reach, and watching them take pride in creating their own playroom made the project even more rewarding.
What Surprised Me
Every project teaches you something, and this one was no exception.
A few things surprised me along the way:
- The brighter paint colors worked better than I expected. Looking at the paint cards, I thought I’d end up choosing much more muted colors. Instead, I found that the brighter colors looked balanced once they were paired with the white walls and natural wood trim.
- It was worth making multiple trips to Home Depot. Seeing the paint cards at home and in different lighting gave me much more confidence in the final color palette.
- Tiny gaps in the painter’s tape matter. Even small openings between pieces of tape can let paint seep through, especially when you’re using a roller.
- The wall color trick really works. Painting over the tape with the original wall color before applying the rainbow colors created much cleaner edges than I expected.
- The kids’ involvement became one of my favorite parts of the project. I originally thought it would end in catastrophe, but aside from a little bit of red paint accidentally getting on the wall, it ended up being one of the most memorable parts of the entire mural.
If I Did It Again
Overall, I wouldn’t change much about the finished mural.
I would still choose six colors to match the rainbow storage bins, and I’d still make each stripe four inches wide so the mural fits naturally between the LEGO wall and the closet door.
There are a few things I’d do differently, though.
I’d plan on two coats of paint from the beginning instead of trying to save time with one.
I’d continue checking the placement from different parts of the room before committing to the layout.
And I’d worry less about choosing colors that felt “too bright.” The finished room has enough neutral elements that the rainbow adds energy without feeling overwhelming.
The Finished Space
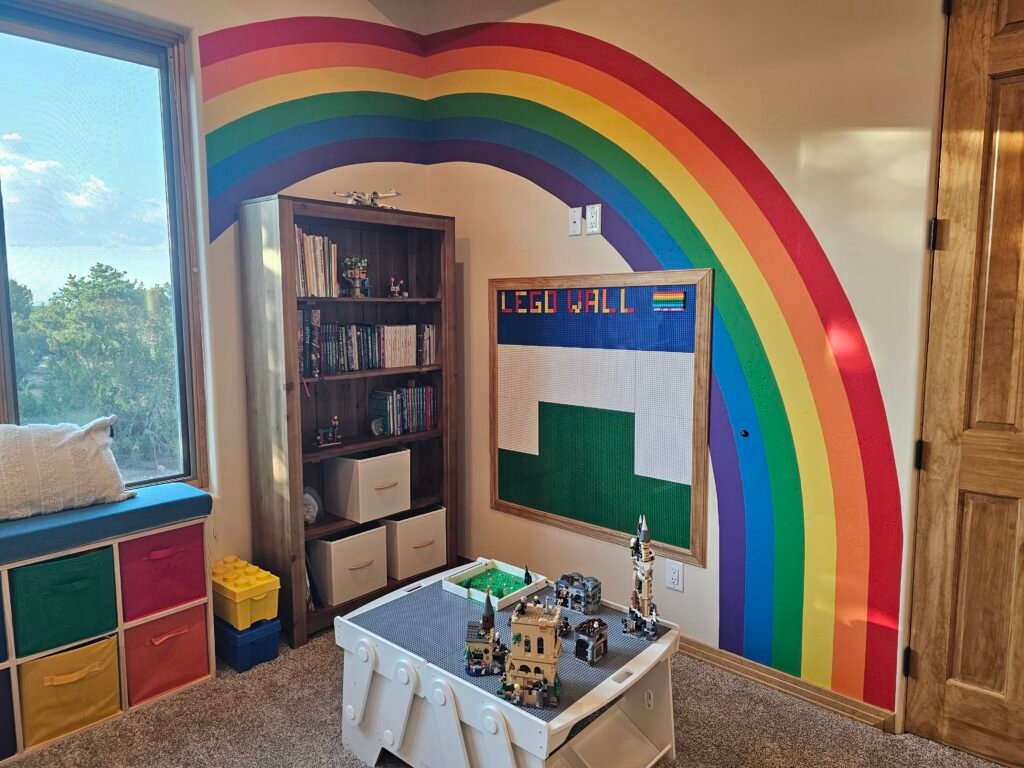
The rainbow ended up becoming exactly what I had hoped it would be. It draws your eye when you walk into the room, ties together the reading nook and LEGO area, and adds color without overwhelming the space.
It’s also one of those projects that looks much more complicated than it actually is. The painting itself is fairly straightforward—the real work is taking the time to think through the layout and colors before you start.
If you’ve been considering painting a mural but have been intimidated by the process, I’d encourage you to give it a try. Start with a simple design, take your time with the planning, and don’t worry if it isn’t perfect. A few touch-ups at the end go a long way.
And if you have kids who are old enough to help, let them. Years from now, I don’t think I’ll remember every little detail about painting the mural, but I know I’ll remember watching them proudly paint part of their own playroom.
Related projects: