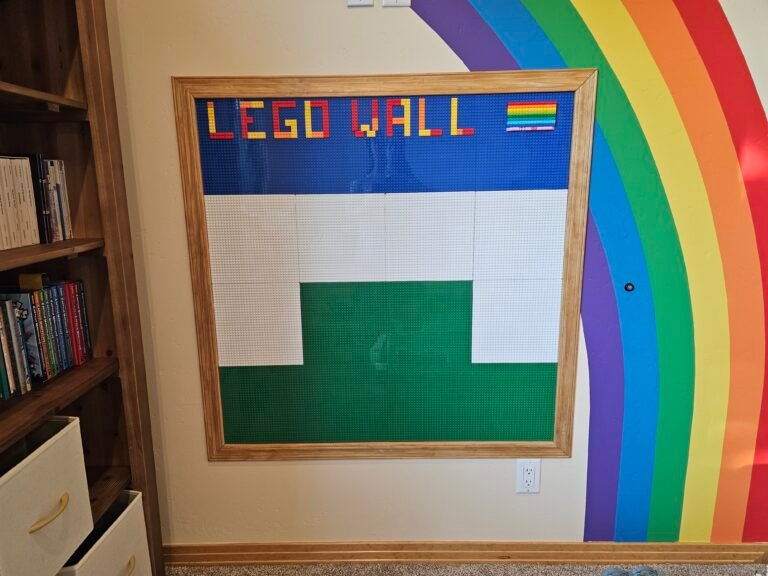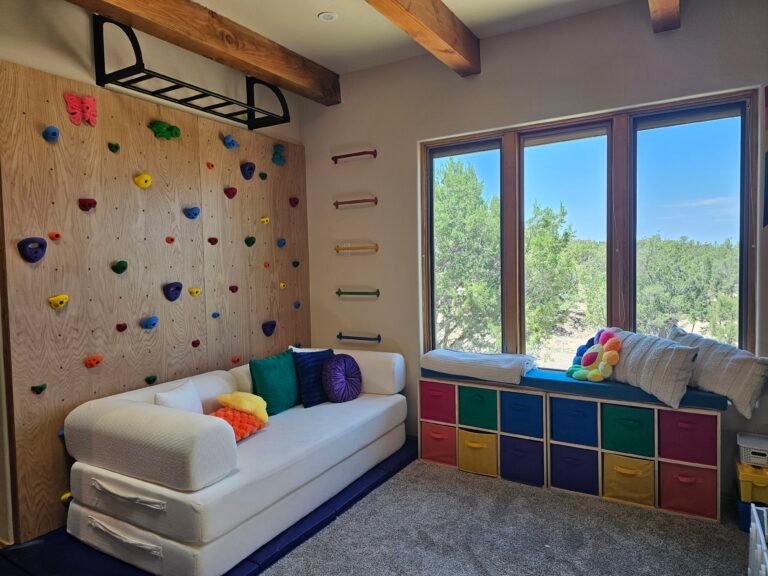
When we finished our kids’ playroom, I knew I wanted one final piece above our U.S. map. I wanted something that felt handmade, tied into the climbing wall and rainbow mural, and that fit with the themes of the playroom.
Instead of buying a sign, I decided to make one—even though I’m not much of a painter. I honestly surprised myself with how it turned out. With a little planning (and some AI-generated mock-ups to help me visualize each layer), I ended up with a completely custom sign that perfectly fit our playroom.
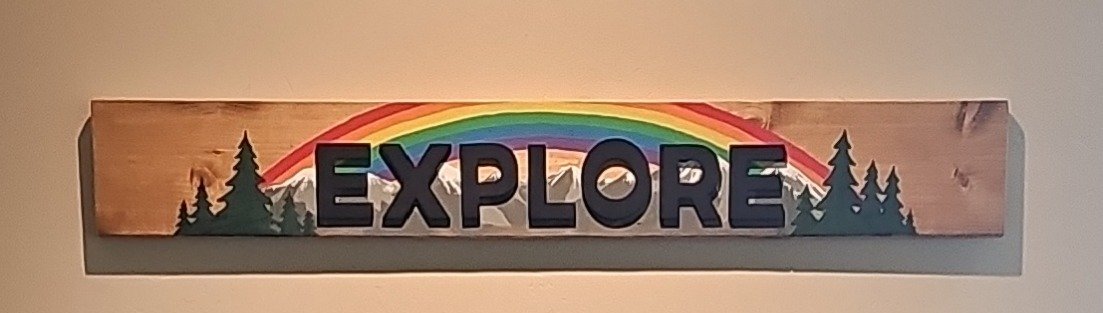
The finished project combines a stained wood background, layered mountain silhouettes, a watercolor-inspired rainbow, and simple evergreen trees. It was one of the quicker and more reinforcing projects I did for the playroom.
Project Details
Skill Level: Beginner to Intermediate
Time: 4–6 hours
Estimated Cost: $30–50
Materials
- 1×6 pine board
- Wood stain
- Acrylic or interior latex paints
- Black
- Pewter Gray
- White
- Hunter Green
- Old Ivy
- Rainbow colors
- Wooden letters spelling EXPLORE – I got 3” tall letters that were ¼” wide
- Wood glue
- 3 sawtooth picture hangers
Tools
- Sandpaper
- Paint brushes (flat, angled, and detail)
- Pencil
- String
- Measuring tape
Step 1: Prepare the Board
Cut the board to the desired length and sand all surfaces, paying special attention to the cut ends. I rounded the edges a bit to take off the sharp edges and corners.
Apply your stain and allow it to dry completely.
Step 2: Sketch the Design
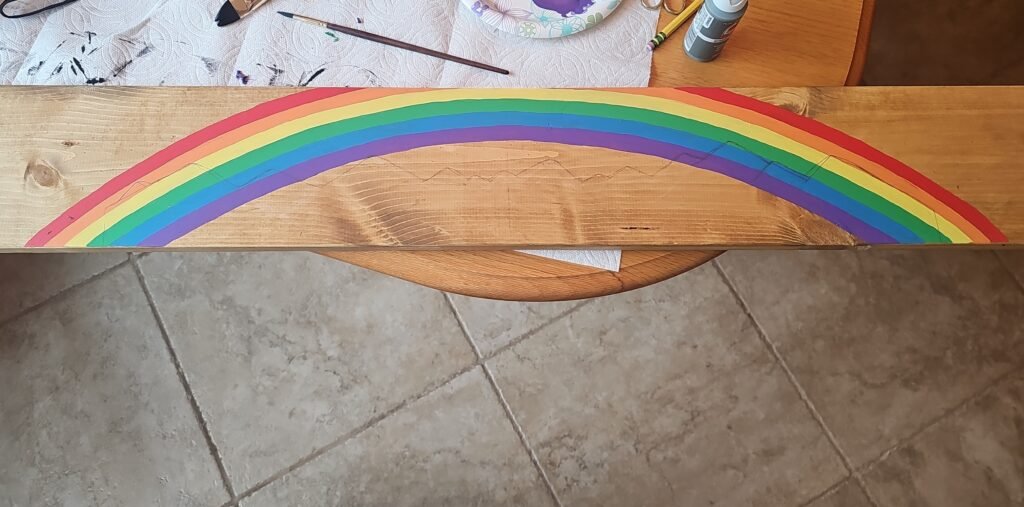
Lightly sketch the rainbow and mountain silhouette with pencil. I used the string method to make sure the rainbow was even – you can accomplish this pretty easily by just holding the string at an anchor point below the board where it creates the arc placement you’re looking for. This provides a rough guide and then you can adjust it visually as you paint the different rainbow colors.
I actually painted the rainbow first and then painted the mountains and trees over it, but if I were to do it again, I would draw it all out first so that I didn’t have to paint over the rainbow colors (it was difficult to fully cover those colors).
I intentionally chose rounded mountain shapes inspired by the landscape in New Mexico rather than dramatic alpine peaks.
(Insert sketch photo.)
Step 3: Paint the Rainbow
Paint the rainbow first.
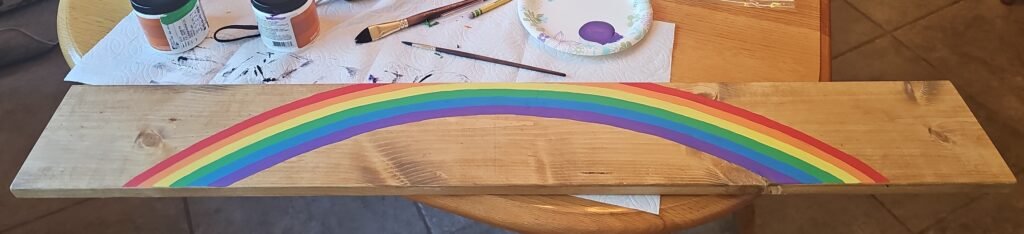
Rather than trying to make each stripe perfectly opaque, allow a little of the stained wood to show through. This creates a softer, watercolor-inspired look and keeps the wood as part of the finished design.
Let the rainbow dry completely before moving on.
I was worried this would come out looking messy or uneven, but I was able to adjust the stripes as I went to make them even, and it came out better than I had hoped. I ended up using leftover paint from the rainbow wall mural which worked well, though you could also use acrylic paints for this.
Using AI as a Design Tool
One of my favorite parts of this project was experimenting with AI as a creative planning tool.
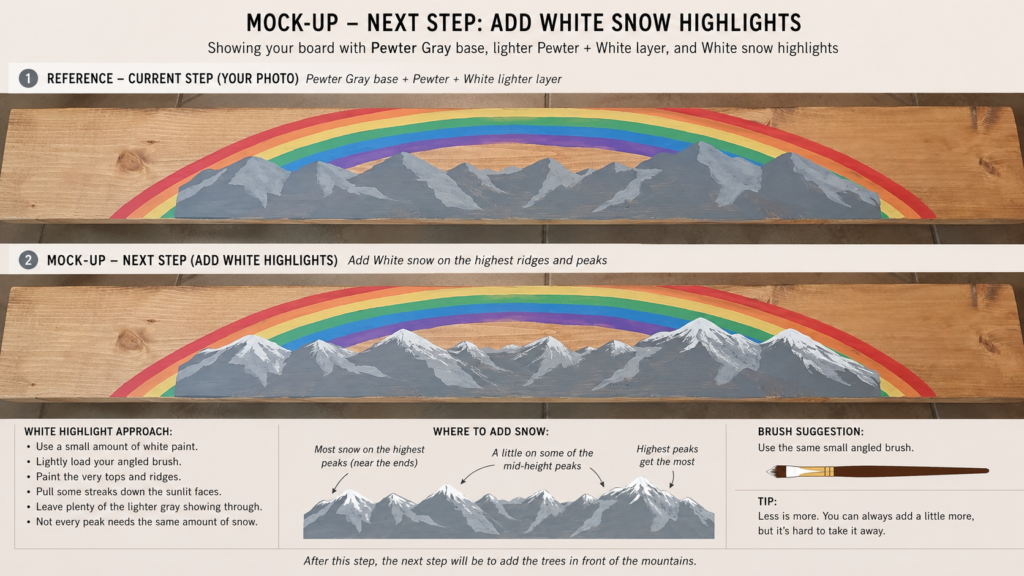
After each layer of paint dried, I took a photo of the sign and asked ChatGPT to generate mock-ups of the next step. Instead of guessing how the finished sign might look, I could compare different options before picking up a paintbrush.
For example, I used mock-ups to visualize:
- Different mountain shapes
- The placement of snow highlights
- Several tree layouts
- The spacing of the “EXPLORE” letters
The AI mock-ups weren’t instructions that I followed exactly—in fact, I often preferred my own interpretation. But they gave me the confidence to make decisions one layer at a time.
By the end of the project, the finished sign looked different from any of the mock-ups, but using them as a planning tool made the painting process much less intimidating, especially since painting isn’t something I’m very experienced with.
Step 4: Paint the Mountains
Paint the mountains in layers.
First, trace the outline of the mountains. I originally did this with more jagged peaks, but decided to round them more.
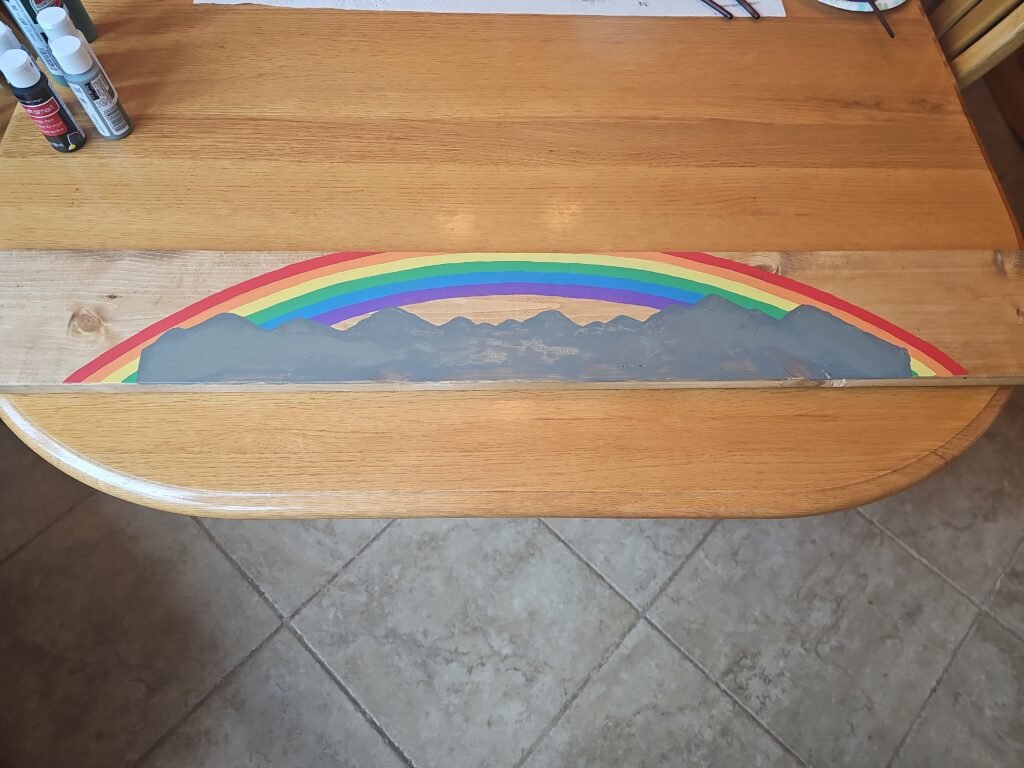
Then paint the entire mountain silhouette with the dark grey. I had ChatGPT draft up a mockup of what this step would look like which I then used as a guide. I intentionally let some of the wood grain show through.
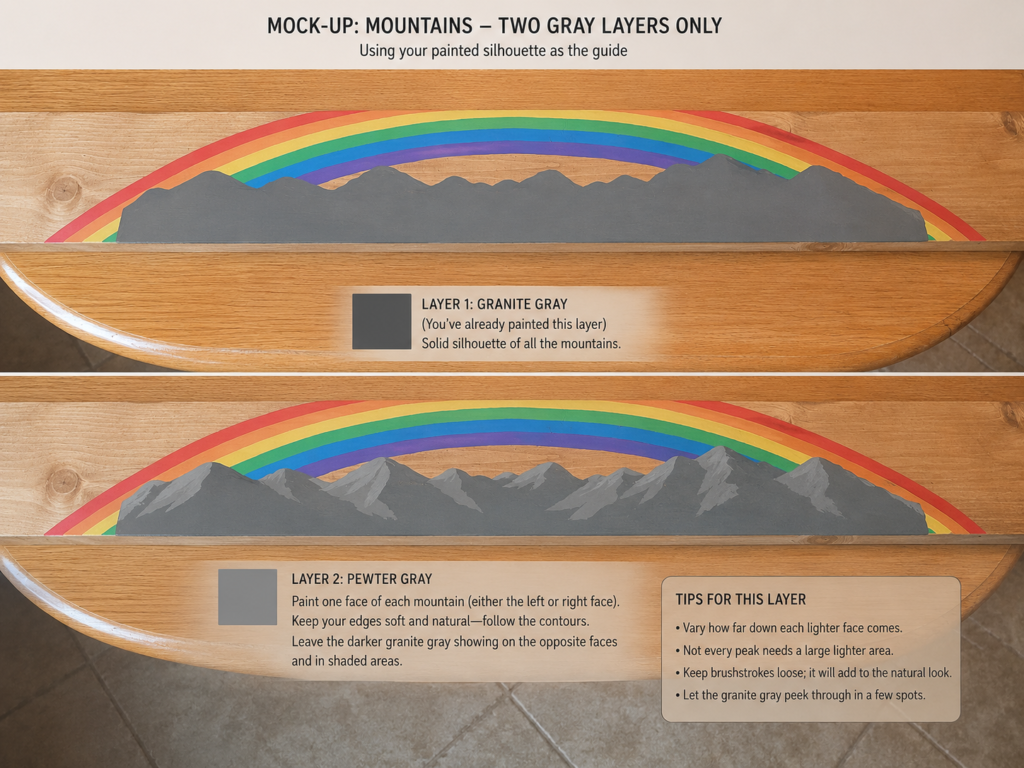
Once dry, add lighter gray to one face of each mountain to create depth. (Again, I used ChatGPT to draft up this step as a guide).
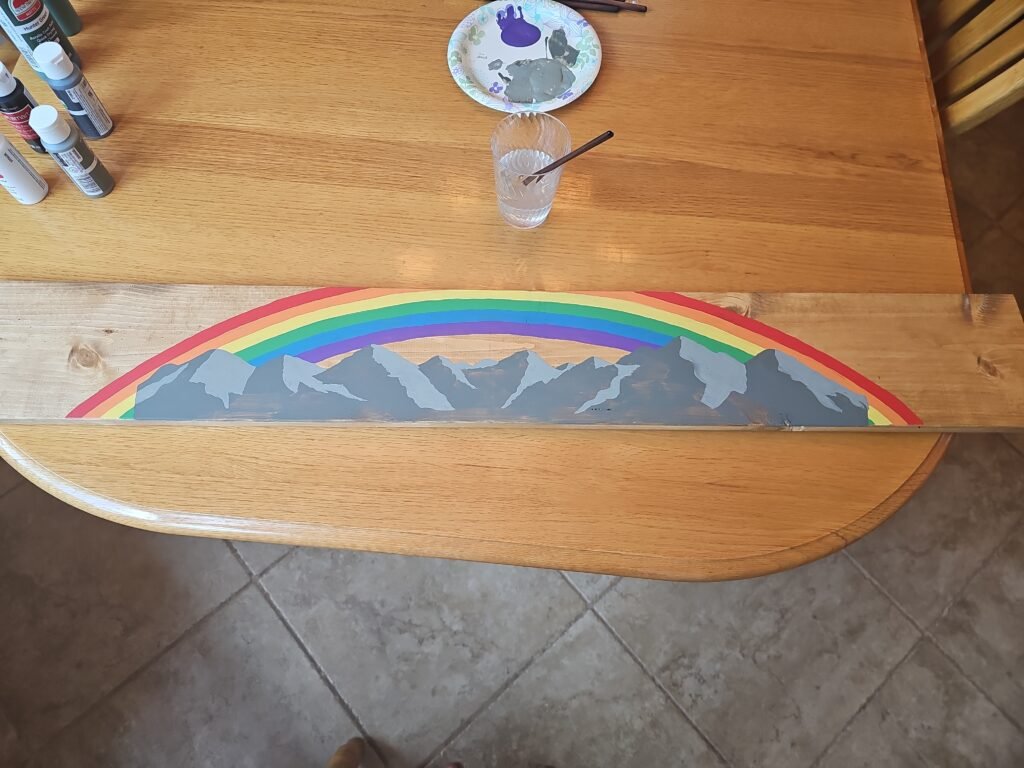
Finally, use white sparingly to create snow on the highest ridges. (Ditto re: Chat GPT). This step felt a little tricky – I was trying to keep very little paint on the brush so that as I dragged the brush downward some of the underlying mountain showed through naturally. It came out really well despite feeling challenging.
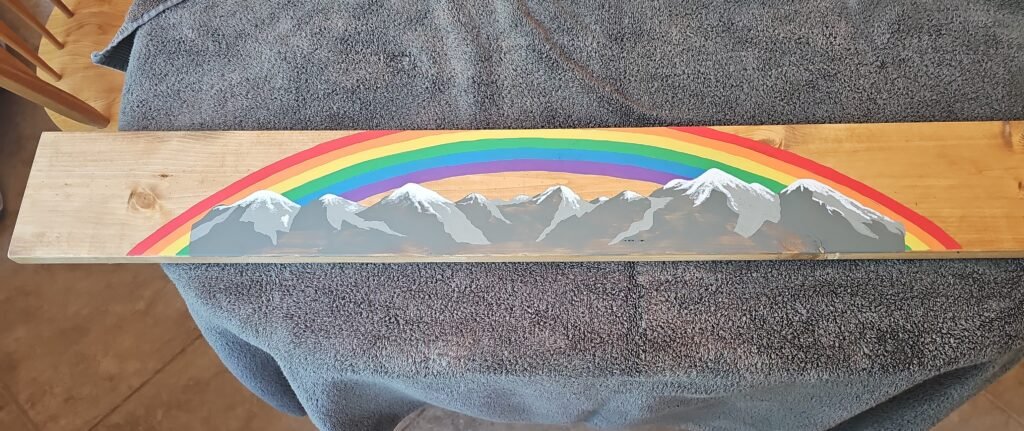
Keeping the paint slightly imperfect and allowing brush strokes to remain visible helps preserve the handcrafted look.
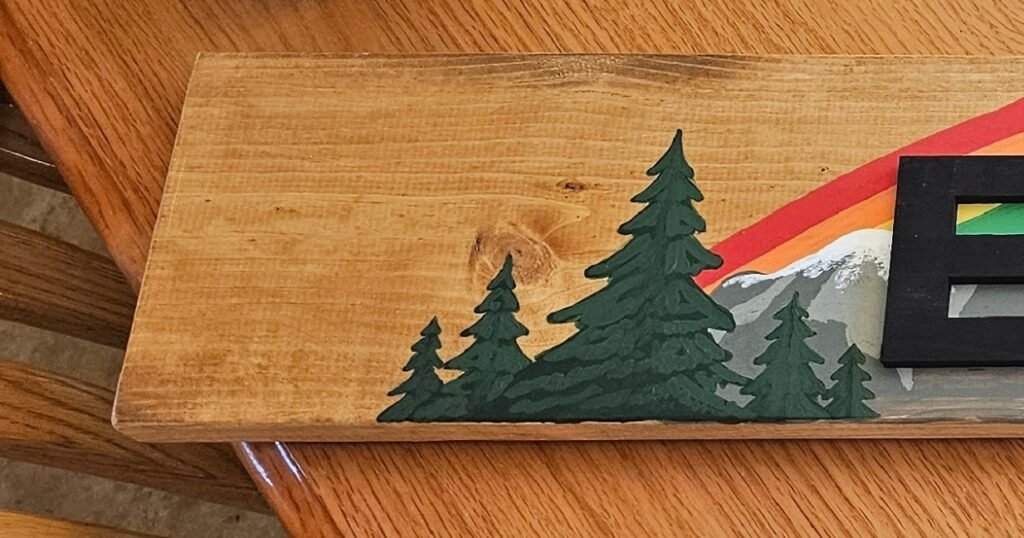
Step 5: Paint the Trees
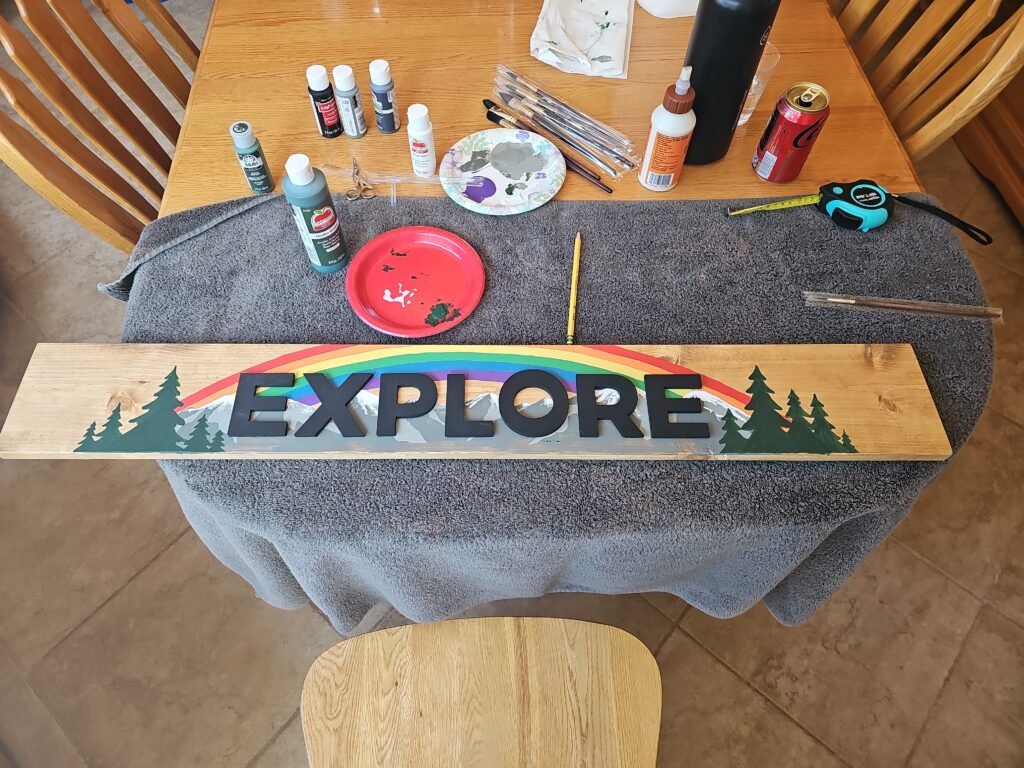
Rather than painting a solid forest across the entire sign, I painted clusters of evergreen trees near each end.
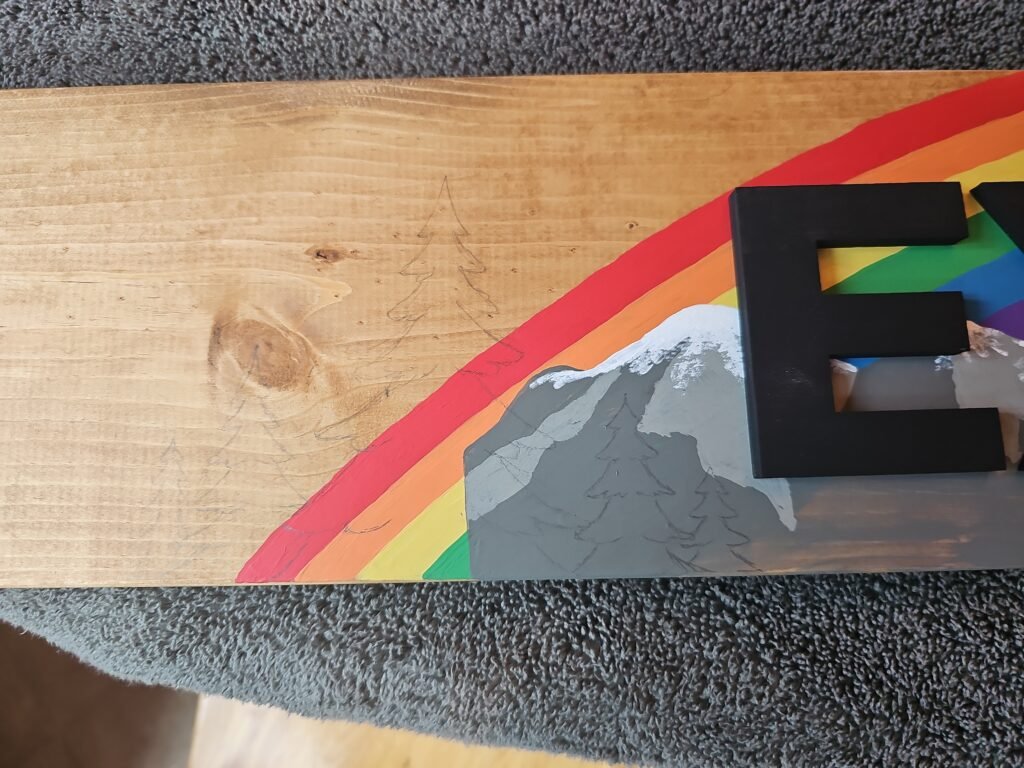
Leaving the center open keeps the focus on the word EXPLORE while still framing the mountains.
I painted the trees first with Hunter Green, then added Old Ivy to one side for depth. Again I used ChatGPT to mockup the steps for me.
(Insert tree photos.)
Step 6: Attach the Letters
Paint the wooden letters before attaching them to the sign.
Once dry, glue them in place with wood glue. I used a paintbrush to paint on the glue to make sure it didn’t leak out the sides when I pressed the letters down.
Take your time positioning the letters before gluing—small adjustments make a big difference in the finished composition.

Step 7 – Hang the Painting on the Wall
For this step I used sawtooth picture hangers. I ended up using the usual two to hang it on the wall, but I added a third toward the bottom of the board to ensure that it hung parallel to the wall rather than at an angle.
Finished Project
(Insert finished photos.)
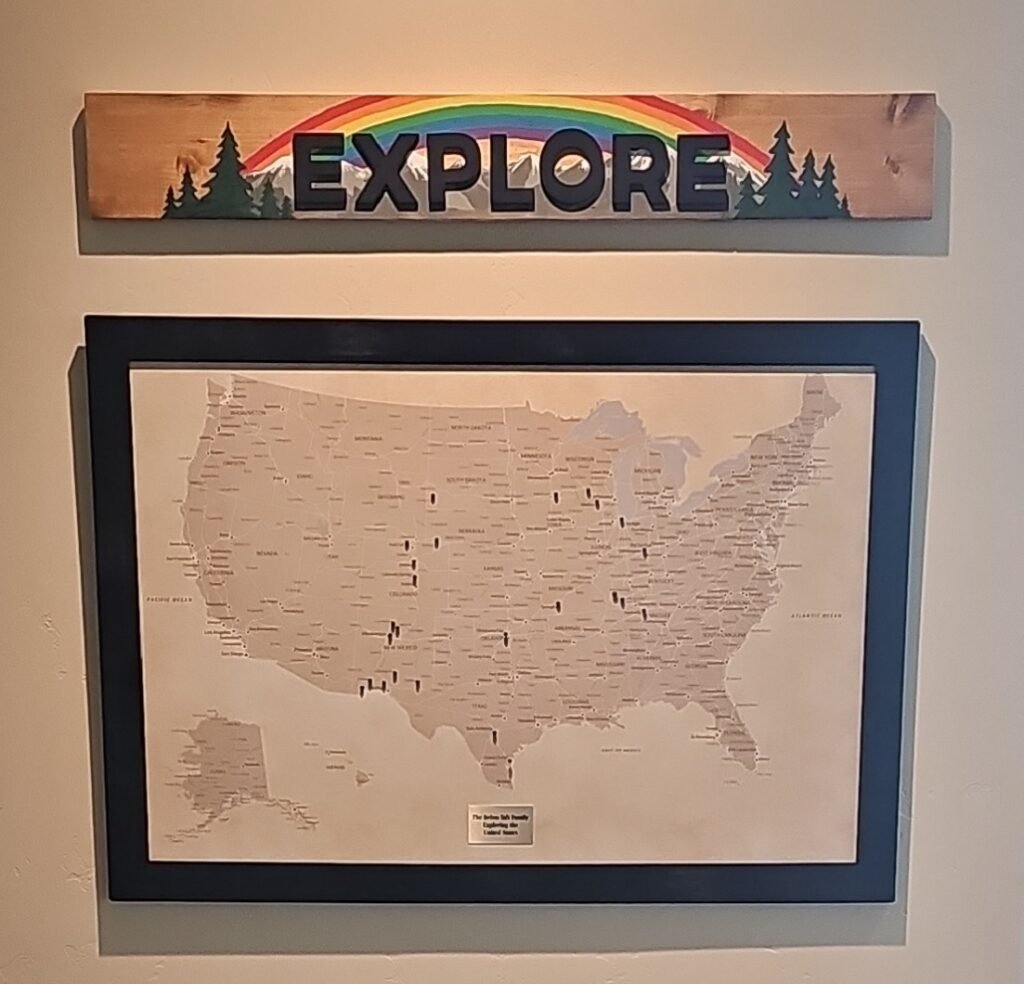
This sign ended up being one of my favorite projects in the playroom. It ties together the climbing wall, rainbow mural, and travel theme while still feeling simple and handmade.
Lessons Learned
- Rounded mountain silhouettes felt much more natural than sharp peaks.
- Building the mountains in layers created more depth than trying to paint everything at once.
- Leaving some of the stained wood visible made the rainbow feel softer and more organic.
- A few trees framing the word looked better than filling the entire sign with a forest.
- Making sure the mountains and trees were somewhat asymmetrical while still maintaining visual balance made it seem natural and realistic.
- I was able to create something beautiful with paint despite not really having painting skills, which I partly attribute to the mockups of each step I created in ChatGPT
What I’d Do Differently
Overall, I wouldn’t change much about this project. The main thing I’d do differently would be to sketch out the entire drawing – rainbow, mountains, and trees – ahead of time and paint into the outlines rather than trying to paint over portions of the rainbow.
Related Projects
- DIY Indoor Climbing Wall
- Rainbow Playroom Mural
- DIY Nerf Wall
- Reading Nook Makeover